
 Sign in

 Български
 Čeština
 Dansk
Dansk
 Deutsch
 Eesti
Eesti
 Ελληνικά
 Español
 Français
 Hrvatski
 Italiano
 Latviešu
 Lietuvių
 Magyar
 Nederlands
 Norsk
Norsk
 Polski
 Português
 Română
 Slovenčina
 Slovenščina
 Српски (Ћирилица)
 Suomi
Suomi
 Svenska
 Türkçe
 Русский
 Українська
How to Prepare a Safety Data Sheet for a Mixture
In this chapter, you will learn how to create a safety data sheet (SDS) for a mixture in SBLCore. First, you will prepare the substances and create the mixture. Then, you will classify the product and complete the individual sections of the safety data sheet.
Prepare the Substances
The SBLCore database contains more than 8,000 substances. It mainly includes substances with harmonised classification and occupational exposure limits. You can use these substances when creating a safety data sheet or modify them according to the supplier's supporting data. If you cannot find a substance in the database, create it manually or import it from the ECHA database.
Before creating the safety data sheet, search the database for all the required substances and prepare them according to the supplier's supporting data. Modify them so that the information matches the original safety data sheet. You can also add toxicological and ecotoxicological data as well as physical properties to the substances.
Procedure:
-
Open the Substances tab.
-
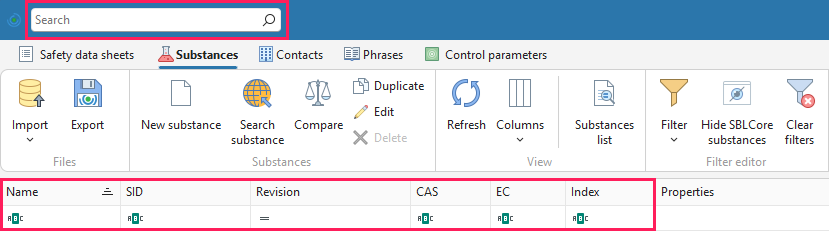
Search for the substance using the search field in the top bar or by using the filters in the columns. For detailed instructions, see the chapter How to Search for a Substance in the Database.
Tip! Search for the substance using numerical identifiers, for example the CAS number. Searching by name is not ideal because a substance usually has multiple names, which also vary depending on the language.
-
Open the substance by double-clicking it or by clicking the Edit button on the toolbar.
Tip! Could not find the substance in the database?
a. Search for it in the ECHA database – click Search substance on the toolbar. For more detailed instructions, see the chapter Importing a Substance from the ECHA Database.
b. Create it – click New substance on the toolbar. For more detailed instructions, see the chapter Adding Custom Substances to the Database.
The substance editor contains several sections. For a detailed explanation, see the chapter Adding Custom Substances to the Database.
Identification
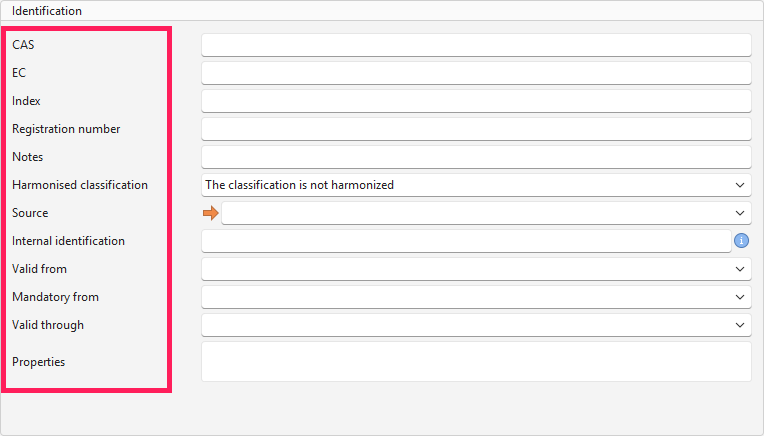
You can find it on the left side of the editor. Complete the substance identification so that you can easily distinguish individual substances in the database. The database may contain multiple versions of the same substance, so it is important to be able to tell them apart.
When you modify a default substance from the SBLCore database, the system automatically creates a copy of it. For both the copy and any new substance, you must complete the Source field. This field ensures that each record is unique and easy to distinguish from the others.
Procedure:
-
After opening the substance, check that the CAS, EC, and, where applicable, Index numerical identifiers match your supporting data. If necessary, enter the registration number (REACH).
-
Use the Notes field only for substances with a harmonised classification. If you are creating a new substance without a harmonised classification, do not modify this field.
-
The Harmonised classification field indicates whether the substance has a mandatory harmonised classification and under which ATP it was established.
A substance with a harmonised classification is a substance that has an assigned Index number and is included in Annex VI of the CLP Regulation. The classification of such a substance is harmonised across the EU and must be used. These substances are included in the SBLCore database, and you should always be able to find them there.
-
Complete the mandatory Source field marked with the orange arrow. We recommend entering, for example, the supplier. This information is not displayed in the SDS.
-
The Internal identification field is used to prefill additional information that will help you identify the substance. This information is not displayed in the SDS.
-
Use the validity and mandatory dates fields only for substances with a harmonised classification.
-
Click the Properties field. A new window will open where you can select one or more properties. The selected properties will then be displayed for the substance in the resulting SDS, for example, indicating that it is a UVCB substance, an SVHC substance, etc.
Substance Names
On the right side of the editor, in the Substance names section, you can add additional names and translations. Use this option, for example, if the substance does not have a name in the language in which you will be creating the SDS.

Procedure:
- Click Add to create a new name. To edit a name, select it and click Edit, or double-click it.
- In the Type field, select the type of substance name (for example, chemical name, IUPAC, or INCI).
- In the next field, select the Language.
- Enter the substance name in the Name field.
- Complete the Description and Note fields if needed. They are not displayed in the SDS.
- If you enter multiple names in the same language, select the Preferred name option for the one you want to use. The software will then display this name by default in the SDS.
- Save the changes by clicking OK.
Classification and Labelling
The classification of substances determines the classification of the entire product. If the classification of a substance in the database differs, modify it according to the supplier's supporting data.
Warning! For substances with a harmonised classification, you can modify the classification only to a limited extent. With a few exceptions, the harmonised classification should remain unchanged – see the table in the Importing a Substance from the ECHA CHEM Database guide.
Procedure:
-
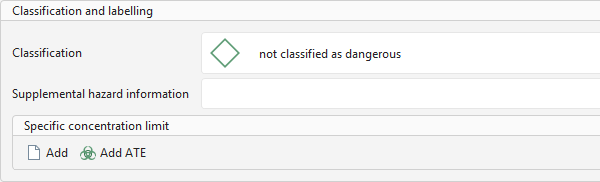
Click the Classification field.
-
A new window will open.
-
The left side of the window contains a list of standard hazard statements.
-
The list consists of three columns: Category, Labelling, and Version. You can filter in each column.
-
You can find a specific statement by:
- filtering in the individual columns,
- using the search field above the list,
- browsing the list manually.
-
Add the statement by double-clicking it. Alternatively, select it and then click the Add selected statements button on the top toolbar. Once you add the statement to the right side of the window, it will automatically be displayed for the substance.
-
To remove a statement, select it with the mouse and click Remove the selected phrases on the top toolbar. You can remove all statements by clicking Clear phrases list.
-
Save by clicking OK.
-
If the substance has an EUH statement, click the Supplemental hazard information field and select it in the same way.
Specific Concentration Limit (SCL)
The SCL determines the concentration at which a specific substance causes a mixture to be considered hazardous and classified accordingly. Classification calculations are usually based on the generic concentration limits. However, if a substance has an SCL, it takes precedence, and the software uses it in the calculation.
Warning! If an SCL has already been defined for a substance with a harmonised classification, do not modify it.
Procedure:
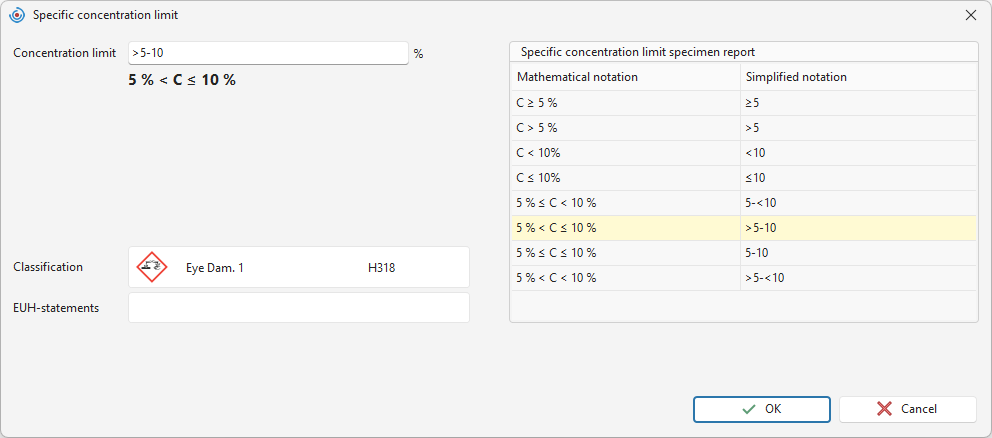
- Click the Add button.
- A new window will open.
- Enter the concentration as a percentage in the Concentration limit field.
- In the Classification field, select the hazard classification to which the SCL applies. If the SCL applies to an EUH statement, select it in the Supplemental hazard information field.
- Click OK to save the changes.
ATE (Acute Toxicity Estimate)
A substance may have assigned ATE values that affect the acute toxicity classification of the mixture. The ATE indicates the dose or concentration at which serious toxic effects (for example, death) may occur following ingestion, inhalation, or skin contact.
When calculating the classification, the software sums the ATE values of the individual components for the relevant route of exposure and determines the overall toxicity of the mixture.
If you find ATE values for individual substances in the supporting data (Section 3 and Section 11 of the SDS), enter them.
Warning! If the substance has a harmonised classification, do not modify the ATE values.
Procedure:
- Click the Add ATE button.
- In the new window, select the route of exposure.
- Enter the value in the appropriate units.
- Click OK.
Toxicity and Ecotoxicity
If the safety data sheet contains toxicity and ecotoxicity data, enter them.
Procedure:
-
Click Add.
Tip! You can speed up data entry for the most commonly used information by using the Preset button (top right).
-
In the Toxicity field, select the type of data: DNEL/PNEC (Section 8), Toxicity (Section 11), or Ecotoxicity (Section 12).
-
The remaining fields will adapt to the selected data type.
-
Complete the available information and click OK.
Physical and Chemical Properties
If you find physical and chemical properties of the substances in the supporting data (Section 9), enter them.
Procedure:
- Click the Add button.
- In the new window, select the property you want to enter.
- For some properties, the system automatically pre-fills the units. For others, you must enter them manually. In some cases, you can also choose from several options.
- Enter the values and click OK.
Control Parameters
Control parameters are established substance exposure limits (Section 8) that define safe levels of chemical substances in the workplace.
If a substance has a control parameter, the software automatically assigns it after the substance is saved based on the specified identifiers (CAS, EC, Index). If you are creating a new substance and the required control parameter is not displayed, you can add it manually.
Procedure:
- Click the Add button.
- In the new window, select the state for which the limit applies.
- Select the type of limit.
- Enter the available information – the official source and the value.
- Save by clicking OK.
The software saves the parameter to the database and automatically assigns it to other substances with the same identifiers.
Create a Safety Data Sheet
After preparing the substances, go to the Safety data sheets tab.
Procedure:
-
Click the New button on the toolbar.

-
Select the state where you will market the product. The language is automatically adjusted to the selected state. For some states, you can choose from multiple languages.
-
In the third field, select the product type – Mixture.
-
Click OK.
-
The safety data sheet editor will open.
The editor is divided into individual sections. You can easily switch between them using the ribbon or by scrolling with the mouse.
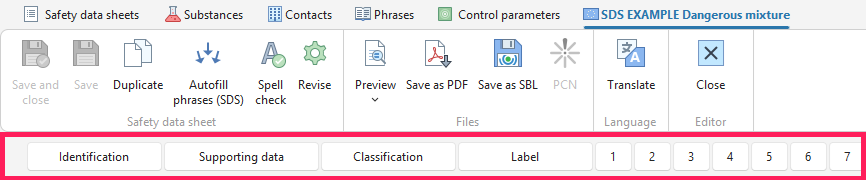
Identification
Identification
- Enter at least the Trade name. You can then save the safety data sheet.
- If the product has multiple names, add them in the Packaging, additional names, additional UFI section.
- In the Number field, you can enter the product identifier that will be displayed in the SDS.
- The Format field shows under which regulation the safety data sheet has been created.
Version
In this section, you can edit the SDS version number, the creation date, and the date of the latest revision.
Internal Records
You can complete this section as needed. This information is not included in the exported document.
Mixture Notification
In this section, you can enter the information required to notify a hazardous mixture through the PCN portal. You must submit a PCN notification for mixtures classified with H2xx and H3xx hazard statements. If you are notifying a mixture through PCN, also generate a UFI code and select the EuPCS product category.
If you already know that the product will need to be notified through PCN, you can enter the required information now. For detailed instructions, see the PCN Step by Step guide.
Contacts
Select the companies you want to display in the SDS. You can only select a company that already exists in your address book. In the Person responsible for the safety data sheet field, select from the address book the person responsible for preparing the safety data sheet. The final document will display the person's name and email address.
If the company is not yet in your address book, create it by following the Creating a New Company guide.
Packaging, Other Names, Other UFIs
In this section, enter the packaging information required for the PCN notification. You can also add additional product names and additional UFI codes.
Supporting Data
On this tab, enter the information that the software will use to calculate the product classification.
Classification Data
-
Use – select the intended users of the product:
- Consumer use (retail) – the product is used by the general public in a household environment,
- Professional use – the product is used by a trained person outside an industrial setting (for example, a tradesperson or a cleaning company),
- Industrial use – the product is used in manufacturing or large-scale industrial operations (for example, in a factory).
During automatic classification, the software assigns the appropriate precautionary statements (P-statements) according to ECHA guidance.
-
If this information is available, enter it. It affects the classification calculation:
- physical state,
- pH – affects the calculation of the product's corrosivity,
- flash point and boiling point – affect the calculation of the product's flammability,
- kinematic viscosity at 40 °C – affects the assessment of the aspiration hazard,
- corrosion rate at 55 °C – affects the calculation of corrosivity to metals.
You can also enter these and other properties in Section 9.
-
If the product is an aerosol, select the appropriate category in the Aerosols field.
-
In the Product type field, select whether your product is:
- a paint or thinner,
- a detergent,
- a biocide,
- a fertiliser,
- a plant protection product,
- a pesticide.
Based on your selection, the software adds the relevant legislation and displays additional fields that need to be completed. For example, additional fields are displayed for detergents, paints, and thinners.
-
If the supporting data contains toxicity and ecotoxicity information for the mixture, enter it. You can find it in Sections 11 and 12. Do not enter data for individual substances. You have already entered that information for the substances themselves.
- Click Add.
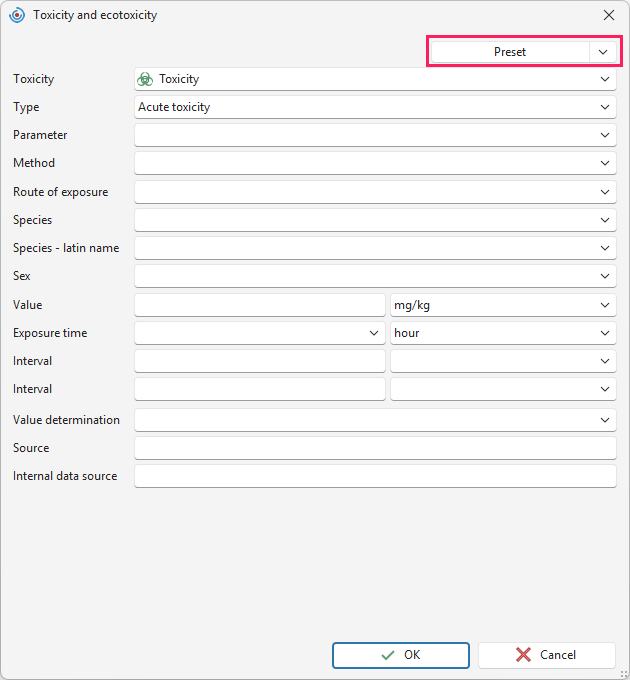
- You can speed up data entry for the most common information by using the Preset button in the upper-right corner of the window.
- In the Toxicity field, select the type of data: DNEL/PNEC (Section 8), Toxicity (Section 11), or Ecotoxicity (Section 12).
- The remaining fields will adapt based on your previous selection.
- Enter the available information and confirm by clicking OK.
Fields in which you enter your own text (for example, Source) are not translated automatically when the SDS is translated into other languages. You will need to translate them manually.
Product Components
Add the substances contained in the mixture to this section.
-
Click the Add button and search for the substance.
Tip! Search for substances using numerical identifiers, such as the CAS or EC number.
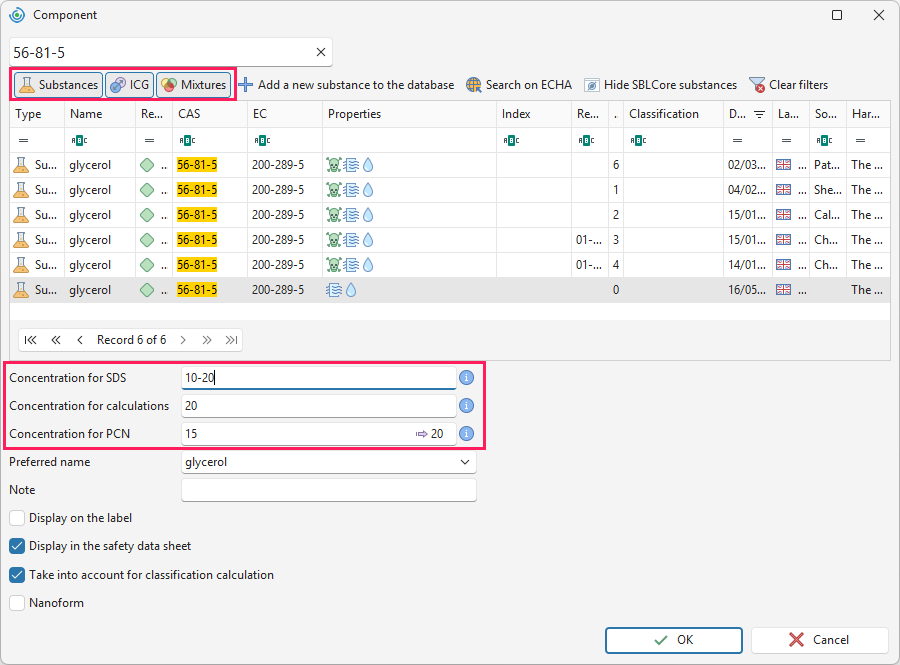
You can also add mixtures that you have already created in the database. You can filter the list by selecting the required category (Substances, Mixtures).
-
Click the component you want to add. Then enter its concentration in the SDS concentration field. This concentration will be displayed in the resulting safety data sheet. The software automatically populates the Concentration for calculations and Concentration for PCN fields.
- If you enter the concentration as a range, for example 10–20, the software uses the higher value for classification and the PCN notification. In this example, it will use 20.
- If the software should use a different value, edit the appropriate field, for example to 15.
-
In the Preferred name field, you can select the name under which the substance will be displayed in the safety data sheet and on the label.
-
You can select several options:
a. Display on the label,
b. Display in the safety data sheet,
c. Include in the classification calculation,
d. Nanoform.
Legislation specifies which substances must be listed in the safety data sheet and on the label. When you run automatic classification, SBLCore automatically determines which substances these are and selects the first two options accordingly.
Tip! Do you want to store the complete product formulation in the software? Enter all substances. Then choose which substances will be displayed in the safety data sheet and which will be included in the classification calculation.
Classify the Product
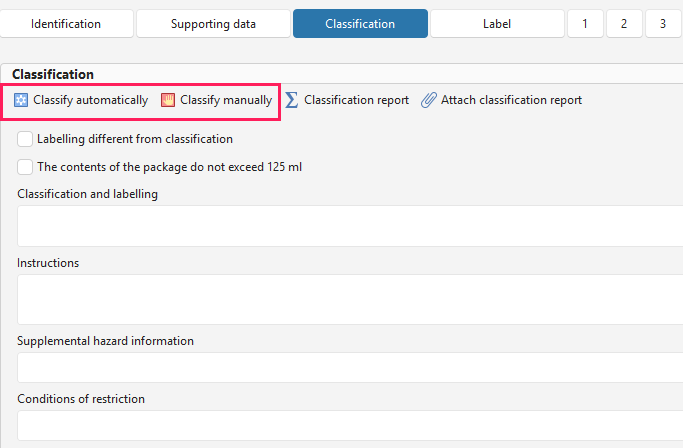
You can classify the product either automatically or manually. Automatic classification evaluates the hazards based on the information you enter in the supporting data. If you want to classify the product manually, select the Classify manually option.
When you choose automatic classification, the software automatically determines whether the product must be notified through the PCN system. You can find the result on the Identification tab. In the Mixture notification section, check the PCN notification status field.
Automatic Classification
-
Click the Classify automatically button.
Tip! If the package contains no more than 125 ml, select the Package content does not exceed 125 ml option. The software will take this exemption into account in both the safety data sheet and the label, allowing you to omit certain labelling elements. If you do not want this exemption to be displayed in the safety data sheet, use this feature later in the Label section.
-
A window displaying the calculated classification will appear.
-
In the upper-left part of the window, you can enable or disable the following functions:
Additive component properties – the software adds together the hazardous properties of components that have the same hazard class. If this function is disabled, the software does not add together the concentrations of these components. As a result, the mixture may not exceed the classification threshold for that hazard class. The software will then not generate the corresponding H-statement for the mixture, even if some substances in the mixture have it. We recommend leaving this function enabled.
Partial recalculation for the environment – when calculating environmental hazards (H4xx), the software also takes into account the ecotoxicological data of the individual components. This means the calculation also includes substances that are not classified with H4xx statements but have ecotoxicological values entered in Section 12.
Ignore hazards from substances below the cut-off values – when calculating the classification, the software ignores substances that are present only at very low concentrations and do not exceed the specified threshold values.
-
If the product contains components with acute inhalation toxicity, the Acute inhalation toxicity field is displayed in the upper-right part of the window. The software automatically selects the route of inhalation based on the physical state. You can change the suggested option. For aerosol products, the software always selects the dust/mist option.
-
The window also displays the resulting product classification and the recommended precautionary statements (P-statements). You can modify them after confirming the classification.
-
Below, you will find the substances that the software has selected for the label and the SDS in accordance with legislative requirements.
-
At the bottom of the window, you can choose from several additional functions:
- Attach the classification report to the SDS – the classification report summarises the calculation procedure and the data used for classification. When you enable this function, the software prompts you to name the file after the classification has been completed. After you confirm by clicking OK, the file is added to the Attachments tab.
- Autofill phrases – after you confirm the classification, the software automatically completes all sections.
- Do not change P-phrases according to classification – select this option if you enter the P-statements manually or are editing an SDS in which the P-statements have already been selected.
- Include non-mandatory substances in the SDS – the software determines which substances must be listed in Section 3. If you want to include all substances, enable this function.
-
Confirm the automatic classification by clicking OK.
-
If you want to select different precautionary statements, click the Instructions field. This window works the same way as the H-statements window. Some precautionary statements include a supplemental text, which is an optional part of the statement. These statements have text in the Supplement column. To edit the supplement, double-click the selected statement.
-
Add any EUH statements in the Supplemental hazard information field.
-
You can also complete the Conditions of restriction field if required.
Manual Classification
You can enter the classification manually based on the supporting data.
-
Click Classify manually.
-
On the left side of the window, you will find a list of standard hazard statements.
-
The list has three columns: Category, Labelling, and Version. You can filter in each column.
-
You can find a specific statement by:
- filtering in the individual columns,
- using the search field above the list,
- browsing the list manually.
-
Select a statement by double-clicking it, or select it with a single click. Then click the Add selected statements button on the top toolbar. Once the statement has been added to the right side of the window, it will automatically be displayed for the product.
Tip! How to select multiple statements at once: Hold down the Ctrl key and click to select multiple statements. Then click the Add selected statements button on the top toolbar.
-
The selected statements are displayed on the right side of the window.
-
To remove a statement, select it with the mouse and click the Remove the selected statement button. To remove all statements, click Clear phrases list.
-
Save by clicking OK.
-
Click the Instructions field and select the P-statements as described in the previous chapter. Some precautionary statements include a supplement, which is an optional part of the text. You can identify these by the text shown in the Supplement column. To edit the supplement, double-click the selected statement.
-
Add any EUH statements in the Supplemental information field.
-
You can also complete the Conditions of restriction field if required.
Classification Report
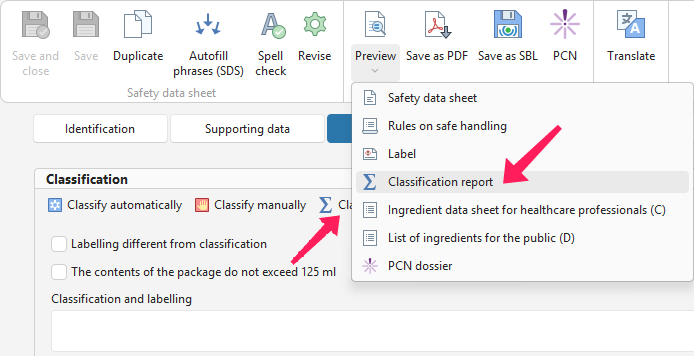
After completing the classification, you can review the calculation process in the Classification report. Open the document by clicking the Classification report button in the Classification section or from the toolbar by expanding Preview – Classification report.
Complete the Sections
In addition to automatic classification, you can populate the text in the safety data sheet in two ways:
Procedure:
-
To populate the entire safety data sheet, click Autofill phrases (SDS) on the toolbar.

-
To populate individual sections, click Autofill phrases (Section). This button is available in every section.
Warning! Sections 9 and 14 are not populated automatically. Complete them manually.
-
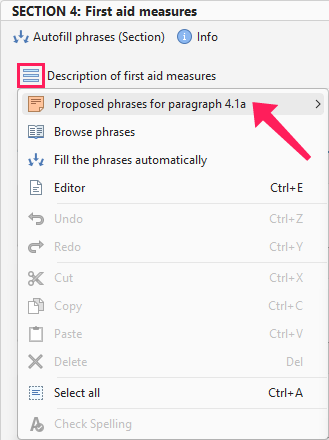
You can also click the blue icon with three horizontal lines next to each subsection. This opens a menu with the following options:
- Proposed phrases for paragraph – a quick selection of commonly used phrases for the selected field.
- Browse phrases – select a phrase from the list.
- Fill the phrases automatically – the field is completed automatically.
Warning! Blue underlined text indicates that the phrase is not included in the SBLCore database. SBLCore will not translate these texts automatically when the SDS is translated into other languages. You will need to translate them manually.
Edit the text as required.
Before Exporting
You can preview the completed SDS by clicking Preview on the toolbar. You can export it in PDF, DOCX, RTF, or XLSX format.
You can also export the file by clicking Save PDF on the toolbar.
Don't forget to save the SDS to the database. On the toolbar, click Save or Save and Close.